In My Kit

Review: Vera Mona Color Switch Duo

I am always on the hunt for new makeup inventions that will make my life as a pro makeup artist and as a makeup addict so much easier. I have been a huge fan of

Vera Mona Color Switch Duo

 since I saw it on IG.  It literally is one of the best makeup inventions ever that I have come across.  If you only have a few makeup brushes and need to quickly clean your brush to move on to your next color, this product makes it so simple! Keep in mind that it does NOT sanitize your brushes but rubs away the pigment left from your previous shadow to move on to the next one.  This is should only be used for quick color changes if you do not have a spare brush on hand. For instance using a black shadow first and then using a white... if you don't clean the brush you will get a gray color instead of pure white.
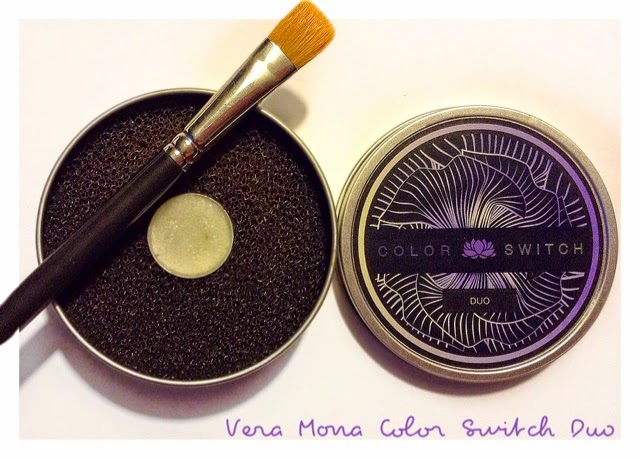
Here are the steps:

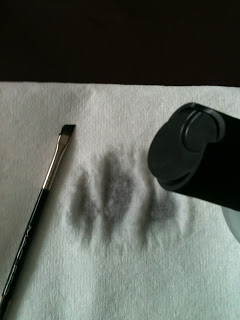
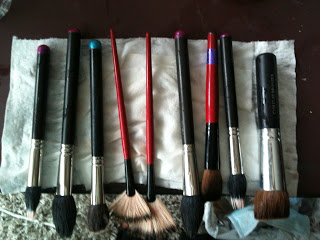
1. Take your pigmented brush (I find that flat brushes work better MAC #252 or #242 brushes) and swipe it back and forth against the black sponge. The friction of you rubbing the hairs against the black sponge pulls the eye shadow pigment from the brush. Do this for both sides until it looks clear.

 2.  For the middle white sponge all you need to do it soak it with water and press your eye shadow brush to use it for wet makeup applications like pigments. 

 If you are a makeup addict you really need this product in your life! I've seen some other makeup enthusiast make their own. Try it and see if it works for you.  My husband was even amazed and couldn't stop playing with it. lol 

Check out the video to see it in action! 

DIY Lipstick Palette

I am always looking for ways to improve my Pro Kit especially when it comes to organization.  I will definitely give you a tour of my kit so you can see what's all in it along with some of my favorite products that I take with me when I am on location.

I've always wanted to make a lipstick palette with magnetizable pans to condense my lipsticks since it's so hard to carry 30+ lipsticks with you.  I had some extra empty eye shadow pans that I use to press loose pigments so I decided to melt all my popular bridal lipsticks down into the pans and then placing them in  see-thru palettes (very similar to the Z-palettes) that I have been making (more about this later in a later post). 

Materials you will need

  • lipsticks - any brand, texture or finish will work
  • empty aluminum or tin pans - Personally I like to use tin because you don't need a magnet if you are using a magnetized palette.  I get all my pans at TKB TRADING you can get the traditional 26mm circle pan or other sizes and shapes they offer. 
  • palette knife 
  • labels - you can cut labels to fit the bottom of your pan or purchase pre sized labels
  • hair straightener - I purchased a cheap hair straightener just to use for projects such as eye shadow depotting and for melting. 
  • empty eye shadow palettes - many brands carry empty palettes from ELF to MAC which has dividers or Z-Palette.  I make my own, it's so fun to make! 

First take your lipstick and cut about 1/4 -1/2 of the stick to melt.   A palette knife or even a regular butter knife would work as well. The color that is shown is Wet N Wild Matte Lipstick 901B.  Swatches of my Wet N Wild Matte Lipsticks coming soon!

 Now smash the lipstick until you fill up the whole pan.  The palette knife helps smash and spread the product nicely.

 Place your pan on your hair straightener and watch it melt to a liquid constancy.  I keep the heat level on the lowest setting.  If you straightener does not give you option to change the heat levels just watch it carefully so it does not burn.  The pan will not harm your hair straightener just wipe it down before you use it on your hair. 

Naturally, you will see bubbles appearing, do not worry this is easy to solve.  Just take something sharp and pop them. Or move the bubbles to side and scoop them away. 

Once you feel the lipstick has melted, carefully remove the pan from the straightener.  The lipsticks is in liquid form, try to have a steady hand when doing this.  It is also very hot! Pretend the lipstick is a pizza and you are taking it out of the brick oven! A steady hand will do the trick.  You see there's a air bubble that I couldn't remove, once I took the pan away from the heat source it went away.  I spilled a little too. lol

 While you are waiting for your lipstick pan to dry, prepare your label.  Just found these labels at Office Depot.  You can even use a label maker such as a P-Touch, whatever you can find around the house will do. 

Once the  pan solidifies just add your label to the bottom.  Yay! You just created your own lipstick pan.  Be creative and create your own custom colors.  No more loose lipstick cases everywhere.  

 It's an addicting process, you literally want to melt down all your lipsticks you have into pans.  I have a ton of lipsticks but I really just wanted to have a set with all my bridal colors that I use regularly.

The completed project.  I know a lot of you are going to ask how I made the knock off Zpalette.. I will save this for a later post. :)

Have fun melting away!!!

MAC FIX + and the many uses

Having worked for MAC for 5 years, I always get asked what my favorite MAC product is.  As a consumer and Pro Makeup Artist I would say hands down MAC Fix+ because of it's many uses that many people don't really know about.  Being a makeup artist for roughly over 10 years I have experimented with different products to produce other uses than what it's intentionally intended for.  They kinda just happen unexpectedly, more like accidentally.

 Definition of MAC Fix+ taken directly from

maccosmetics.com

"An aqua-spritz of vitamin and minerals, infused with a calm-the-skin blend of green tea, chamomile, cucumber, topped off with the fresh, natural, energizing scent of Sugi. Adds radiance, finishes makeup. Spray it on. Skin drinks it up!"

VillabeauTIFFul definition = Vitamin Water infused cocktail for your skin. Basically a spray on moisturizer!

I have compiled a list of some of my favorite ways to use Fix+.  Keep in mind that they might not work on everyone but at least you can try it and see if it works for you.

  • use as a light moisturizer when you have oily to normal skin
  • pair with your cream moisturizer for dry skin
  • spritz on after your makeup to finish it (this is more to melt on the minerals together to set it.  This spray does NOT make your makeup waterproof or sweatproof)
  • for added moisturization on dry areas of your body such as hands, knees and elbows spray on selected area and then follow up with your favorite body lotion.  The fragrance in Fix+ is very light so it will not alter the scent of the body lotion. 
  • make an eye cream cocktail for tired eyes and puffiness!  Simply take a little bit of your favorite eye cream to the back of your hand (use the back of your hand as a working palette) and then add 2 drops of Fix+ to the cream, mix the eye cream with Fix+ together and apply cream with your ring finger to the under eye puffiness.  Keep away from direct contact with your eye as it may irritate your eye.  The caffeine and green tea are great ingredients to tone down puffiness.  
  • Full coverage foundation to heavy for you especially for the summer time? No problem, just spray a couple spritzes on your foundation brush to dampen it up a little and then apply your foundation.  When the foundation brush picks up the liquid or cream foundation is thins it out by not picking up too much product.  You can also make a foundation cocktail or concealer cocktail (same method as eye cream cocktail listed above) to thin out heavier products. I use this method a lot for my pro kit. 
  •  Mix your loose eye shadows or pigments with Fix+ to create a paste/cream texture to apply to your lids.  I find this works extremely well for full on color payoff and it's not as messy to work with.  I actually prefer using all loose products this way, it totally changes the "oomph" of the product. 
  • I also have a small bottle of Fix+ with me in my purse when I feel I need a little pick me up for my makeup.  You know the feeling when you had a long day at work and your makeup looks drab? A few spritzes will refresh your makeup looking fresh and alive again. 
  • Is your scalp feeling dry? Spray Fix+ on your roots and your scalp for a instant hair tonic moisturizer.  
  • Added too much blush? Don't worry just lightly mist your cheeks and take a clean brush (not the brush you applied the blush with) and blend away.  This will create a softer, wash of color cheek. 

I hope you learned some great tips, I would love to hear some of yours! Please share! :)

DIY Brush Cleaner

 I have been making my own makeup essentials for the past couple of months including makeup remover and brush cleaner.  I find that these 2 products I tend to run out faster than the rest of my makeup products.  These things are expensive especially when you use these products on a daily basis and when you are professional makeup artist. 

I found this recipe on the web originally from Enkore Makeup (youtube beauty guru) I actually added the Witch Hazel (found out that my Smashbox Brush Cleaner has this ingredient in it).  When I make brush cleaner I usually double up on the measurements to make one large batch and then distribute in large bottles. Since I use brush cleaner almost every day making a lot was a better idea than having to keep making a small batch every week.  This recipe is great for deep cleaning and fast spot cleaning, I will demonstrate both methods.  

The ingredient brands are up to you, personally I like to use more natural ingredients.  All the ingredients that I used can be found at Target and are very inexpensive.  Check your local Dollar Store for supplies to mix your ingredients or for empty travel spray bottles to store the liquid.  I get all my little containers and bottles at Daiso, a Japanese dollar store (everything is actually $1.50, but the quality is very good). 

Mix the following ingredients together in a large container (I like to use a small pitcher that I designate just for making brush cleaner. The spout makes it easier to fill bottles:

- 1 cup of distilled/purified water

- 1/4 cup of 70% isopropyl alcohol

- 1/2 tbsp dish soap (I used J.R. Watkins Natural Home Care Dish Soap Grapefruit)

- 1/2 tbsp gentle shampoo (I used Comforts For Baby Body Wash/Shampoo - Mild Hypoallergenic Tear Free)

- 1 tbsp of leave-in conditioner (I used Pantene, this will help keep the hair of your brushes soft)

-2 tbsp of Witch Hazel

Gently stir to prevent suds from forming. If you do get foam just fill your bottles at an angle, the foam will stay in the pitcher. 

You can always twerk the recipe to your liking.  Don't add too much alcohol or else it will dry out your brushes and don't use too much soap as it will leave your brushes soapy if you are using it as a spot cleaner.  

all the  ingredients I used 

different bottles  to store the brush cleaner in

 To spot clean just squirt a little bit of liquid onto a paper towel.

 Take the brush and wipe it back and forth until all the pigment comes off the brush.  You will see the makeup on the paper towel.

 Deep cleaning is great if you have a ton of brushes that need to be cleaned.  I like to deep clean my personal brushes at least every other week or until I feel they are getting yuck. Place your brushes in some sort of cup or jar.

 Fill the jar with your home made brush cleanser do not exceed past the silver part of the brush (ferrule).  The bristles/hairs should be emerged in the cleaner.  For now the liquid is clear... just wait

 Swish the brushes around until you see the liquid turn color... YUCK!

 Look what the brushes left behind.. just think of all the build up if you haven't washed your brushes for lets say a month!! ACK!

Rinse your brushes with warm water while shaping the hairs.  Lay flat to dry over a table edge so that the brush head can dry all around. Do not place your brushes back into a cup or holder the water will fall into the ferrrule (silver part of the brush that holds the hairs together with glue).  Once water gets in there the glue becomes loose and hairs will start to fall off. 

---> these are my professional brushes I take with me on location.

I have used this recipe for almost 3 months now and I have not had any problems with my brushes.  I use my personal brushes every day so they do get a lot of use.  I love how it smells and it cleans my brushes very well.  Give this recipe a try, you will not need to buy brush cleanser ever again!!!

P.S. I will post my DIY makeup remover next week.. :) I love making my own makeup products!  If you have any recipes that you would like to share... please share away! :)

The Cutest Brush Roll EVER!

I love supporting independent shop owners who make their own handmade goods like the ones you can find on

Etsy

.  Recently I have been addicted to Etsy, all these cute things that I want to buy.  For the past several year I have been on the lookout for the PERFECT brush roll.  You might be wondering what is the perfect brush roll in my eyes? Well, I must have lots and lots of pockets to hold my valuable tools.  Pockets not only for different size brushes but  for must have products that I use on all my clients such as eye liners, eyelash glue, setting spray in a small travel size bottle and etc.  A protected flap that would protect my brushes when they were not in use. Many brush organizers out there are belts.  I am a petite filipino girl and a belt loaded up with brushes weighs me down.  Even when I worked for MAC I did not wear my brush belt around my waist instead I wore is over my shoulder like a messenger bag.  Even if the organizer wasn't a belt it would be a roll but it wouldn't be able to hold all my brushes. Yes, I could just bring a few brushes with my when I am on location but I like to be prepared.  It's hard when you have a big wedding party, doing makeup one after the other and having to clean your 1 set of brushes after each person.  I rather put away the dirty brushes to clean at a later time when I am not busy and start on the new client right away.  Being in the industry for over 10 years I have not found anything that met my standards but I knew someday I would be able to find something.

Ever since I found the wonderful site Etsy, I have a been a big fan of Lotus from

asoftblackstar on Etsy

.  She makes

makeup brush rolls,  makeup bags, flat irons,  and jewelry cases with cute fabrics that can match your personality.  I happened to browse through her store and BEHOLD a brush belt that looked like it would be big enough to hold all my makeup goodies... BUT it was a belt and you know how I feel about belts.  I send Lotus a message via Etsy for a custom made brush roll, instead of a belt if she can design a roll.  Lotus is so sweet and wonderful, she asked questions to determine and needs and wants that I had, listened, created and delivered!  For the fabric I chose a pink and white polka dot inside with cheetah print for the pockets and the outside

. I am so happy how my roll turned out.

It is advised that you spray the brush roll with Scotch Guard before you use it, to make it stain and water resistant.  It's great because if it gets dirty you can just throw it in the wash.  Since my special request Lotus is now offering this design as a regular item in her shop.  For all the makeup artists out there.. YOU NEED THIS! Cute and functional! 

Here are some pics... ENJOY!  

This is what it looks like when it's rolled up.  

Unrolled and ready to use!

close up of the roll