MOTD: Golden/Pink Eye with Masquerade Cosmetics

Recently, I found Masquerade Cosmetics on Instagram and was instanly drawn to their bright colored shadows, I knew I had to get my hands on them.  From their pictures the eye shadows were so richly pigmented very similar to Makeup Forever.  I couldn't wait to try some of their products.  Masquerade Cosmetics is an Australian based company but they do ship Internationally.

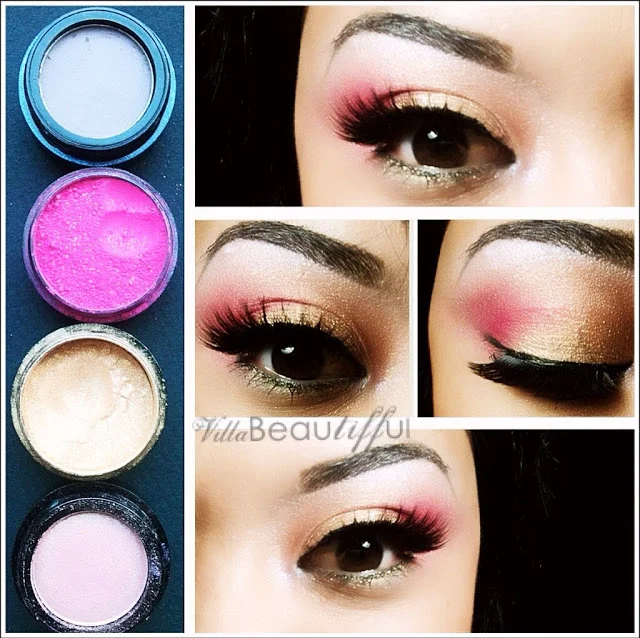
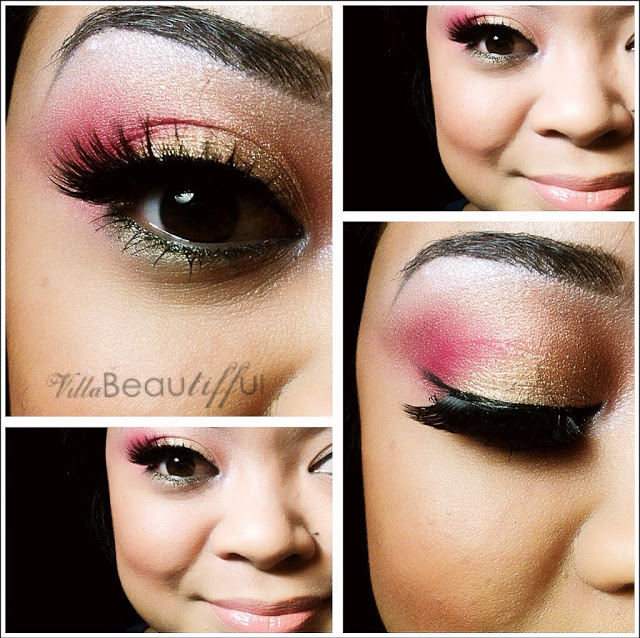
The colors I used to create this look are the following :

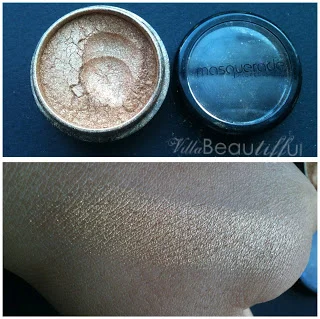
Masquerade Shimmer Powder #67

Warm golden shimmer placed on the lid

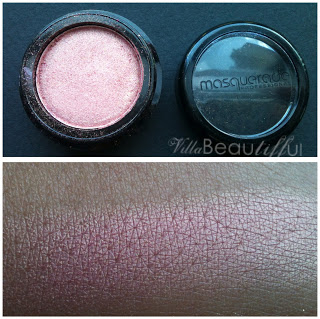
Masquerade Eye Shadow #87

Pretty golden pink shade blended in the crease 

I've been looking for a color like this forever.  It's hard to find a shade like this that's not too gold this shadow has just the right amount of pink and gold.  Looks fab with medium to tan skintones. 

Masquerade Shimmer Powder #96

Bright magenta pink with touches of silver sparkle added to the outer corners of the eyes. I adore this color especially when you mix it with the gold shimmer powder, looks lovely!

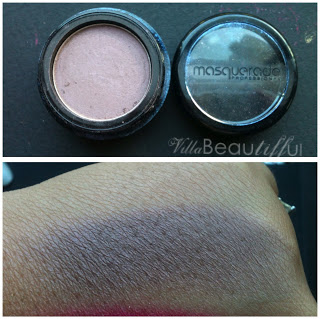
Masquerade Eye Shadow #495

Muted purple grey to add depth in the outer corner crease.  I can't wait to pair this with a smokey eye!

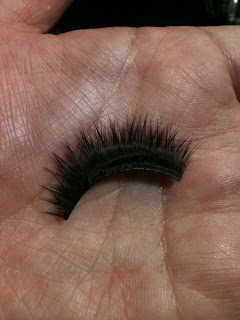
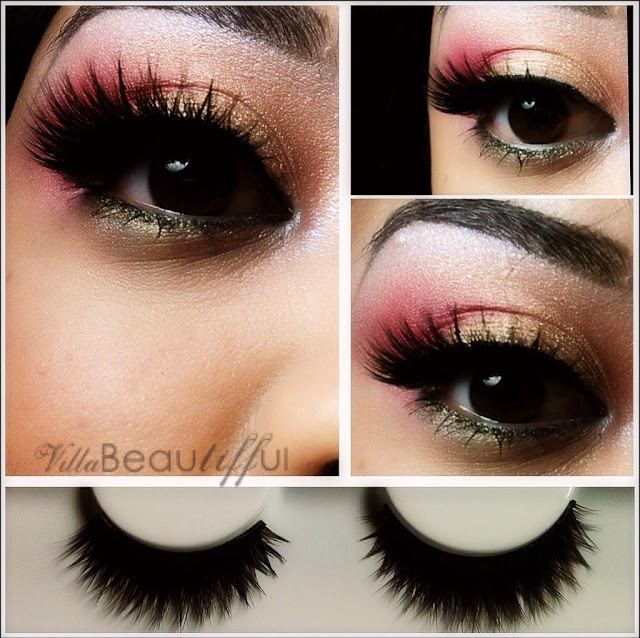
Lashes are the SASHA Lash from FAUXLASH.COM.  Check out my post about these lashes

HERE

Can't wait to create more looks with Masquerade Cosmetics!

Review: Sasha Faux Lashes

I have been eying false eye lashes from

Faux

for a very long time.  I follow the Faux ladies on Instagram and I am always loving the pictures of their lashes, have to say I was a little lash jealous.  Yes, I am a false eye lash hoarder, love any style no matter how long, short, full or sparse they may be.  I will rock anything!

The day that I received a few styles of Faux Lashes I was a little girl in Barbie Heaven! Oh my gosh, they styles I received were just WOW. I couldn't wait to create some new MOTD's with these bad boys.   To add some icing on the cake, they even enclosed a little note! Amazing?! WOW! A fan of mine?!? Back atcha Faux Ladies I am a HUGE fan of yours!!!

You guys need to check out the Sasha Lash, wow! Just the right amount of length and fullness. 

Yes I know they look scary but you just wait when you pair it with a great eye look! Check it out!

AMAZING RIGHT??????? SOOO IN LOVE! 

If you want to know what products I used to create this look click

HERE

.

Swatches: Julie G Nail Polishes

A lovely friend of mine, Katie (

www.beyondtheteachersdesk.wordpress.com

)  brought to my attention the Julie G Nail Polishes. Katie has been my beauty pen pal and a great friend of mine since I met her on Instagram.  She wanted me to grab some for her since her city doesn't have any Rite Aids (this particular drug store is the only store you can purchase these and online at

www.jessesgirl.com

).

So I was off on a mission trying to find the shades that she wanted.  The first two stores didn't have them out yet on their regular shelves but I was determined.  Drove again to another store and finally I was able to find some, even though some of the colors were missing at least the ones she wanted were there.   RiteAid was having a promotion buy $10 of nail polish and receive $3 of Up Rewards (basically free money to purchase more stuff on your next visit, more like a coupon).  The colors look amazing so I had to get some for myself, not just some more like almost all the colors.

Take a look at my swatches! Sorry some of them are a little messy, I was so excited to swatch them.

 Enjoy!!

Oh Em Gee

Bikini

Fierce and Fab

Julie's Fave

Passion

Butterflies and Rosebuds

Dance In The Dark

Royal Rebel

Stiletto 

Mermaids Tale

Metallic Hues

Shimmer Island

9 to 5

Cupcakes and Castles

Chic Cipro

Birthday Suit

Dream In Pretty

Fairytale

Gelato In Venice

Polishes can be found at Rite Aid for $3.99

DIY Lipstick Palette

I am always looking for ways to improve my Pro Kit especially when it comes to organization.  I will definitely give you a tour of my kit so you can see what's all in it along with some of my favorite products that I take with me when I am on location.

I've always wanted to make a lipstick palette with magnetizable pans to condense my lipsticks since it's so hard to carry 30+ lipsticks with you.  I had some extra empty eye shadow pans that I use to press loose pigments so I decided to melt all my popular bridal lipsticks down into the pans and then placing them in  see-thru palettes (very similar to the Z-palettes) that I have been making (more about this later in a later post). 

Materials you will need

  • lipsticks - any brand, texture or finish will work
  • empty aluminum or tin pans - Personally I like to use tin because you don't need a magnet if you are using a magnetized palette.  I get all my pans at TKB TRADING you can get the traditional 26mm circle pan or other sizes and shapes they offer. 
  • palette knife 
  • labels - you can cut labels to fit the bottom of your pan or purchase pre sized labels
  • hair straightener - I purchased a cheap hair straightener just to use for projects such as eye shadow depotting and for melting. 
  • empty eye shadow palettes - many brands carry empty palettes from ELF to MAC which has dividers or Z-Palette.  I make my own, it's so fun to make! 

First take your lipstick and cut about 1/4 -1/2 of the stick to melt.   A palette knife or even a regular butter knife would work as well. The color that is shown is Wet N Wild Matte Lipstick 901B.  Swatches of my Wet N Wild Matte Lipsticks coming soon!

 Now smash the lipstick until you fill up the whole pan.  The palette knife helps smash and spread the product nicely.

 Place your pan on your hair straightener and watch it melt to a liquid constancy.  I keep the heat level on the lowest setting.  If you straightener does not give you option to change the heat levels just watch it carefully so it does not burn.  The pan will not harm your hair straightener just wipe it down before you use it on your hair. 

Naturally, you will see bubbles appearing, do not worry this is easy to solve.  Just take something sharp and pop them. Or move the bubbles to side and scoop them away. 

Once you feel the lipstick has melted, carefully remove the pan from the straightener.  The lipsticks is in liquid form, try to have a steady hand when doing this.  It is also very hot! Pretend the lipstick is a pizza and you are taking it out of the brick oven! A steady hand will do the trick.  You see there's a air bubble that I couldn't remove, once I took the pan away from the heat source it went away.  I spilled a little too. lol

 While you are waiting for your lipstick pan to dry, prepare your label.  Just found these labels at Office Depot.  You can even use a label maker such as a P-Touch, whatever you can find around the house will do. 

Once the  pan solidifies just add your label to the bottom.  Yay! You just created your own lipstick pan.  Be creative and create your own custom colors.  No more loose lipstick cases everywhere.  

 It's an addicting process, you literally want to melt down all your lipsticks you have into pans.  I have a ton of lipsticks but I really just wanted to have a set with all my bridal colors that I use regularly.

The completed project.  I know a lot of you are going to ask how I made the knock off Zpalette.. I will save this for a later post. :)

Have fun melting away!!!

MOTD: Gorgeous Gold with a mix of blues and turquoise

MAC Gorgeous Gold, Freshwater, Plumage and Haunting (Limited Edition).

Trying a new layout for the MOTD'S on Instagram.  Thought it would be nice to showcase the colors that I use so you can see what the actual colors looked like and see if you have colors that are similar.

I am sorry that I have not been posting any new material, been busy planning my wedding, vacationing and beau-TIFF-ing  up brides for their special day.  Promise I'll post more on a regular basis.  :)