Creativity

Filofax: Week 25 Pages Polkadot

filofax_wk25

I am loving this week's Filofax planning page layout (Kate Spade inspired), maybe because I had so many new things to design the 2 page spread! This layout is very different from the layout that I used last week and I am thinking this is the one to stick keep.  I've seen this type of layout used by a few Filofaxers so I decided to make my own through Microsoft Publisher. Super easy! Lots of space to stamp, add post-its, little notes, color, etc.

PRODUCTS USED FOR THIS LAYOUT:

  • Studio L2E Plan It and List It Stamps
  • Kate Spade Paperclips
  • Polka-dot washi tape from Michaels
  • Clear TODAY divider from Heidi Swapp  (this was part of a pack, they are a little short, but too cute not to use).
  • Journal Cards - I made these myself with quotes I found on Pinterest
  • 3x4 journal card protector hole punched to fit the Filofax and added a strip of washi tape for personality.

I hope you are enjoying my creativity posts! Don't forget to subscribe so you don't miss out!

Filofax: Week24 Pages Just the Beginning

My dedicated Filofax designing workstation 

My dedicated Filofax designing workstation 

filofax_wk24_1

This is my first planning pages for my Filofax, not sure if it will work for me but I will give it a try.  I wanted lots of space to write things (to -do lists, projects, notes, etc). However, I am not sure if I will need the timeline for my days since I my work schedule is usually the same every week.  I found inspiration for this layout from Passion Planner but changed it a bit to fit my needs both for personal use and for my blog.  I included a little 3x4 journal card with an adorable picture of my westie, Luca.  He always makes me smile. The quote on the side really spoke to me this week and it kept me on track to be determined to get things done.  I also added a RIGHT NOW to -do insert to plan my posts for Instagram.

Ordered my supplies from scrapbook.com, JoAnn Fabrics, Michael's, Japanese Book Store in Chinatown, Amazon.com,

Ordered my supplies from scrapbook.com, JoAnn Fabrics, Michael's, Japanese Book Store in Chinatown, Amazon.com,

Most of my supplies that I ordered last week came in and I have been busy shopping at JoAnn's and Michaels.  Look at my haul! Can't wait to  get involved with Filofaxing to the max!

Filofax - my new creative obsession to organization

I have always been a lover of arts and crafts since I was a little kid.  My school projects always consisted of glitter, scented markers, stickers, and whatever I could glue on poster board.   Many of you don't know that my hobby is making things - cards, photo books, home decor items, etc.  I can spend hours at Michael's or at JoAnn's, browsing through all the aisles of crafty things.  With makeup taking a majority of my time I usually don't have time or space (half of our 800sq ft. condo is already filled with makeup and a few storage bins of scrapbook paper and crafty "stuff) until I found this picture (the picture is from her blog but I first saw it on Instagram) from my new friend Candi aka FILOEYECANDI 's Filofax.  It literally was love at first sight - creativity, cute crafty things, paper, washi tape .. I was in heaven.  This was my calling ... it was time to get organized and at the same time use my creative skills that I always have deep down inside me.

What is a Filofax? Well it's a personal organization planner/binder from a company in the UK. Very similar to a At-A-Glance planner or a Daytimer that most of us in the US are accustomed to. You can customize it your lifestyle with a monthly calendar or if you prefer a weekly calendar, add a shopping or check list, email address of your friends from high school.. practically everything and anything you can include.  But the fun part is decorating your pages to your liking - add washi tape as a border, stamp days of the week on your calendars, support your lists with cute little paperclips or use scrapbook paper to create inspirational add one note cards.  Possibilities are endless!

I knew I had to stock up on supplies and it was perfect timing because it was Memorial Day.  The first thing I ordered was the Filofax Domino A5 Organiser in Hot Pink! I first saw it on Candi's IG and I knew I had to have one in this color. The title picture above is the organiser open and below is it closed. The bright pink reminds me of MAC Candy Yum Yum Lipstick.  

candyyumyum


Next I went all over the internet looking for Filofax goodies to grace my pages.  Instagram is very good source to get inspiration for your pages but also to see where everyone in the Filofax community gets there cute little supplies.  I kept seeing washi tape from the dollar section at Target hauls.... would I be able to get my hands on this? I guess we will see.

I'll post my hauls in the next couple of days so you can follow me on my journey.  Every week I will post my layout of my weekly calendar and share what's in my Filofax! Click here to see the creative side of VILLABEAUTIFFUL including planning pages and everything creative!

Do you decorate your planner? I would love to see how use your planner as a creative outlet... tweet me - VILLABEAUTIFFUL

Kim K. Midweek Makeup Feature

It's been a great week for me - wedding planning is up and running and I was featured on

Kim Kardashian's Official Website/Blog

in her Midweek Makeup section!!!!! REALLY? YESSS!!!!   The theme this week is White and Bright.  Not sure how long the section would be up but here is the link (

http://kimkardashian.celebuzz.com/2012/09/05/midweek-makeup-white-bright/

) if you would like to see the whole slideshow.  A lot of great makeups!

I don't follow Kim on a regular basis so when an Instagram follower told me about how she saw my picture in the collage, I just couldn't believe it.

Do you see my picture on the bottom left side? It is the Pink, Tan White Prom Look 1 that I did a couple of months ago.  To view the full post click

HERE

.

 When you click through the slideshow the full picture is #9.  

It's a great feeling when your work goes noticed, this just makes me want to blog and post more MOTD's on a regular basis.  Wow, what an amazing accomplishment. 

DIY Brush Cleaner

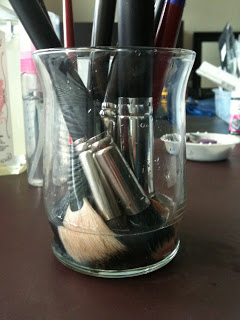
 I have been making my own makeup essentials for the past couple of months including makeup remover and brush cleaner.  I find that these 2 products I tend to run out faster than the rest of my makeup products.  These things are expensive especially when you use these products on a daily basis and when you are professional makeup artist. 

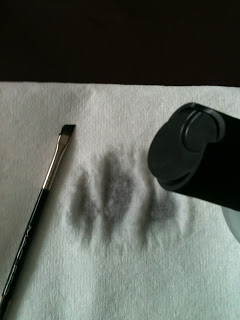
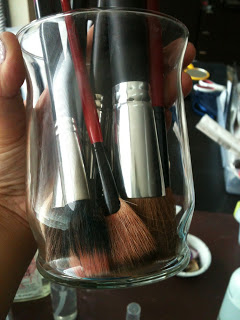
I found this recipe on the web originally from Enkore Makeup (youtube beauty guru) I actually added the Witch Hazel (found out that my Smashbox Brush Cleaner has this ingredient in it).  When I make brush cleaner I usually double up on the measurements to make one large batch and then distribute in large bottles. Since I use brush cleaner almost every day making a lot was a better idea than having to keep making a small batch every week.  This recipe is great for deep cleaning and fast spot cleaning, I will demonstrate both methods.  

The ingredient brands are up to you, personally I like to use more natural ingredients.  All the ingredients that I used can be found at Target and are very inexpensive.  Check your local Dollar Store for supplies to mix your ingredients or for empty travel spray bottles to store the liquid.  I get all my little containers and bottles at Daiso, a Japanese dollar store (everything is actually $1.50, but the quality is very good). 

Mix the following ingredients together in a large container (I like to use a small pitcher that I designate just for making brush cleaner. The spout makes it easier to fill bottles:

- 1 cup of distilled/purified water

- 1/4 cup of 70% isopropyl alcohol

- 1/2 tbsp dish soap (I used J.R. Watkins Natural Home Care Dish Soap Grapefruit)

- 1/2 tbsp gentle shampoo (I used Comforts For Baby Body Wash/Shampoo - Mild Hypoallergenic Tear Free)

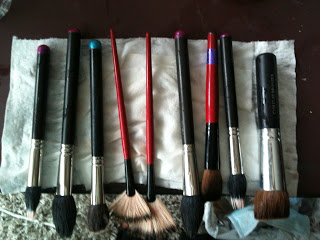
- 1 tbsp of leave-in conditioner (I used Pantene, this will help keep the hair of your brushes soft)

-2 tbsp of Witch Hazel

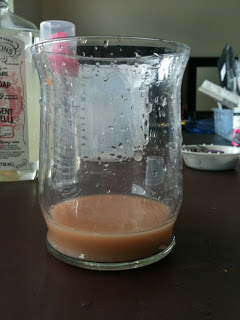
Gently stir to prevent suds from forming. If you do get foam just fill your bottles at an angle, the foam will stay in the pitcher. 

You can always twerk the recipe to your liking.  Don't add too much alcohol or else it will dry out your brushes and don't use too much soap as it will leave your brushes soapy if you are using it as a spot cleaner.  

all the  ingredients I used 

different bottles  to store the brush cleaner in

 To spot clean just squirt a little bit of liquid onto a paper towel.

 Take the brush and wipe it back and forth until all the pigment comes off the brush.  You will see the makeup on the paper towel.

 Deep cleaning is great if you have a ton of brushes that need to be cleaned.  I like to deep clean my personal brushes at least every other week or until I feel they are getting yuck. Place your brushes in some sort of cup or jar.

 Fill the jar with your home made brush cleanser do not exceed past the silver part of the brush (ferrule).  The bristles/hairs should be emerged in the cleaner.  For now the liquid is clear... just wait

 Swish the brushes around until you see the liquid turn color... YUCK!

 Look what the brushes left behind.. just think of all the build up if you haven't washed your brushes for lets say a month!! ACK!

Rinse your brushes with warm water while shaping the hairs.  Lay flat to dry over a table edge so that the brush head can dry all around. Do not place your brushes back into a cup or holder the water will fall into the ferrrule (silver part of the brush that holds the hairs together with glue).  Once water gets in there the glue becomes loose and hairs will start to fall off. 

---> these are my professional brushes I take with me on location.

I have used this recipe for almost 3 months now and I have not had any problems with my brushes.  I use my personal brushes every day so they do get a lot of use.  I love how it smells and it cleans my brushes very well.  Give this recipe a try, you will not need to buy brush cleanser ever again!!!

P.S. I will post my DIY makeup remover next week.. :) I love making my own makeup products!  If you have any recipes that you would like to share... please share away! :)