Nails: Sally Hansen Jewel Overcoat

My other obsession is glitter nail polish, actually anything that is glittery is an obsession of mine. lol. It seems like all the major nail polish brands out there are coming out with their own type of huge chuck hexagon glitter top coats.  I love it! I was first hooked when OPI by Sephora first launched the gold one ( Only Gold For Me) for the holiday season.  As a makeup artist I always want to make sure my nails are always presentable, and this polish sure grabbed a lot of attention.  I then added the silver top coat (Flurry Up) to my ever so growing nail polish collection.  But I wanted more, and more of this type of top coat.  I searched high and low and bought a few from OPI, China Glaze and Essie, but you know I just wanted more and more.  I think of makeup and nail polish like shoes - you just don't have 1 pair but various different styles and colors to accommodate your outfit this is the same with your nails and makeup.. Oh lets not forget your hair as well.

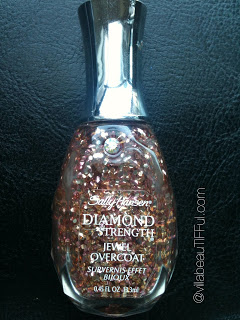
I was strolling around my local Walgreens for my weekly drugstore haul and low and behold!! WOW! Sally Hansen Diamond Strength Jewel Overcoat in pretty colors. MUST GET ALL, so I did. lol.

You cannot beat the price, buy 1 ($4.99) get 2nd for 50% off.

The collection is very bridal inspired. There are 4 jewel overcoats and then 4 regular nail polishes. Here are the jeweled colors:

 501 - Ring-a-Ding

*favorite, pretty with orange or light pink polish*
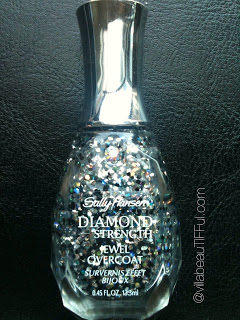
 503 - Muti-Faceted

*favorite, love the black, blue and silver glitters* 

505 - Let's Dance!

*pretty, it's like glitter rain on your nails*
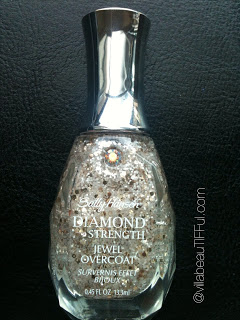
507- White Veil   

 *was dissapointed in this one which the white sparkles showed up more looks more like white sand which chunks of larger gold hexagon glitter*

 I have very short nails, so I decided to do the swatches on a fake nail that I painted with white nail polish. Excuse my mess up on the Ring-a-ding nail and the Multi-Faceted.. :/ I was in the process of gluing down the fake nail then I pressed too hard on the tip of the nail glue that it broke and the nails were still wet. Perhaps I should stick to being a makeup artist.   Oh well, so sorry!

I hope you enjoy my nail polish swatches I'll be doing more of these in the future!!!

MOTD: Yellow/brown with a touch of blue

For today's MOTD I decided to change it up a little bit with a different layout.  I thought it would  be nice change to do more of a tutorial picture layout to show all my followers the steps to achieve this look.  It has been a huge success and will be posting more MOTD'S like this from now on.  If you don't know already I take all my makeup pictures with my Iphone 3GS and use FrameMagic (layout the pictures) and BeFunkyPro (edit pictures). Many people cannot believe that I do, but YES I do! These two programs have made my MOTD'S amazing!  My lighting always helps and I will share that later. A post about the My MOTD Style process is long overdue.. I must share the background.  SOON!

I have used the color yellow for a lot of my MOTD'S, before I hated wearing this color but now I can't get enough of it.  Yellow is a color that you really need to pair with a darker shade to add a contrast and depth to your makeup.  Pairing it with another brighter color would also look great! Some colors that would compliment the yellow would be bright blue, teals, grass greens, and oranges/pinks/corals (this combination makes a lovely sunset look).  I haven't tried purple yet, but I am sure it would look great also.

MAC Shadows

Gesso (highlight)

Brown Down (upper crease) use with MAC #224 brush for more a diffused blending effect

Embark (crease) use with MAC #219 brush and then blend with either #224 or #217

Chrome Yellow (lid) wet your brush with MAC Fix+ and apply the yellow shadow to make it more intense

Freshwater (lower lash line) a q-tip helps create a soft blended look for a drop shadow.

The lashes are 2 pairs layered on top of each other.  I will have a post about this later.  No particular brand of lashes, just the ones that I get at the Japanese Dollar Store, Daiso.  I love layering lashes because you can create your own style and look.  Also the lashes are only $1.50!

Tutorial/MOTD: Shades Of Purple

I am so late to post this, a little bit less than a month. ACK! I totally forgot that I had this waiting for me to publish. 

Since I was a kid I was always drawn to the color purple. I love wearing purple for eye shadow and eyeliner, and if the color is right on my lips as well. Purple is a wonderful complimentary color to green/hazel eyes.

  • Eyeshadow - Coastal Scents 88 Color Palette

Side note: When I was filming the video I used the light pink color. When I was taking the pictures I realized it was too light so I packed on the color next to it which is a mauve/purple/pink color. It is up to you which color you prefer.

  • Eye Liner - Maybelline Master Precise Liquid Eye Liner Pen Black
  • Glitter Eye Liner - NYX Liquid Crystal Liner Crystal Hip
  • Mascara - MAC Studio Fix Boldblack Lash
  • Lashes - Daiso
  • Lips - L'Oreal Colour Riche Balm Pink Satin and L'Oreal Colour Juice Pina Colada

Don't forget to subscribe to

Villabeautifful YouTube Channel

!! :)

MOTD: Hunger Games

The hottest new movie out right now is Hunger Games and I haven't even seen it. I was intrigued by the trailer I saw during a commercial break from one of my television shows and also this inspirational set from Polyvore. I can't wait to see the movie to actually see what the dress looked like.

Hunger Games Tribute

Hunger Games Tribute

by

pisces7

featuring

long dresses

My Inspiration for the look

Start with your highlight and work down is the easiest way to achieve all the different colors to blend into each other.  You can't tell in the picture but I do have the yellow color wrapped around from the inner corner of my eye to just above my natural crease.  I would recommend layering the orange/red color until you get the desired effect that you are trying to achieve.  A bullet tipped brush such as the MAC 219 works best to get more defined saturated color  and to have that winged look.  I have no specific names of the colors as these are no name brand eye shadows but as long as you stick to colors that are similar you will be set to go.  The lashes are from the Japanese Dollar Store I always mention, Daiso.  These type of lashes really gave a nice overall finish to the eyes.

I'm thinking of creating a series of makeup looks from Hunger Games... we will see where this takes me :)

MOTD: Yellow and a mix of blues

I really love Pinterest, it's a great social website to share pictures with others of things that "interest" you from all over the web. You simply "pin" whatever you like on the web and categories your pins to boards.  It's very much like your online scrapbook.  Whoever thought of Pinterest is a genius! I have so many pictures saved on my computer and then when I want to go back and see where I got it from I can't remember.  Once you pin the picture to your board you can go back and click it to be linked back to the original location.  AMAZING!  The more people you follow who have the same interest as yourself the more pictures will show up on your main page that you can pin.  Follow me on

PINTEREST

I recently found this picture, and I knew instantly that I had to recreate this look.  The makeup was done by Foreverfashion78 it was done so beautiful! My look isn't 100% like hers but it's close and I love how it turned out.

MAC Cosmetics Eyeshadow

Mylar (highlight)

Chrome Yellow (above crease) Contrast (crease)

Electric Eel (lid)

I used colors that were similar to hers. The look was actually pretty easy to recreate.  I found it was best that you start with your highlight, then crease with the yellow and blend upward toward the highlight.  This will help prevent the blue taking over the yellow.  Don't forget to use your eye primer to make the colors just pop!

I am going to start posting my MOTD's from Instagram on my blog to give you some detailed information on how to recreate some of the looks.  More and more makeup candy pics for you!!